31 December 2008

I can see 2009 it's nearly here

Quick 1 minute left to get a picture in 2008 (London, UK time zone)

If you've been reading this you need a round of applause and a wish of a Happy New Year. A new year that's a whole 365 days or 8760 hours of picture taking opportunity just waiting round the corner.

Happy New Year

Too late...
Post your January 1st pictures on flickr and add it to the blabpictures group, though remember embarrassing photos of last nights party are not the best thing in the cold light of a New Years Day.

-blabpictures-

Grips

Vertical grips...if you're not using an EOS-1 Series camera, then a grip is a very useful accessory to have if you intend shooting with either long lenses or in a portrait format. For one it helps the camera balance better, for the other it gives you vertical shooting buttons to provide a more stable shooting position. If you use an ordinary grip, it also gives you two battery slots and therefore double the shooting time between charges. 

Now, for some users, the WiFi grip might be the way to go. Perhaps you shoot events sometimes and WiFi helps you get images in front of subjects quicker. Or maybe you work in a studio and you like to WiFi out to a computer which projects directly to a wall, giving you and the model a big view of the images you're shooting. 

Chances are though that you don't use WiFi all the time - maybe you're out on location and don't need the WiFi functions. Having two grips - one ordinary, one WiFi would be a bit extravagant. Instead, why not just use the WiFi grip for everything? Makes sense right? Except the one thing you need to do is remember to turn off the WiFi function. If you leave it on, it'll keep flashing at you and also use the battery in there more than it needs to. If you turn it off, you still get all the vertical shooting buttons, and while you don't get two batteries powering the camera at the same time, you do at least have a spare battery with you at all times, 'stored' in the WiFi grip just waiting to be swapped with the one in the camera when it gets low. 

To turn the WiFi grip off, just go to the menu, select WFT Settings and in Communication mode, choose "Disconnect". And that's it. Your WiFi grip will not keep trying to transmit and you still get the vertical shooting buttons and better balance. 

-blabpictures-

30 December 2008

Off camera cord OC-E3 is your friend for wireless flash

It's Tuesday so I needed a photographer to feature, but in lieu of some photographer here's a tale of how even the simplest accessory can be your saviour in times of need.

The humble off camera cord OC-E3 sits on your hotshoe and connects the master flash to the camera. In fact the camera thinks the flash is on the hotshoe so you get all the control but now the flash is off camera and you can move it for better lighting. 

Just yesterday out on a shoot I was trying out some strobist techniques with a Speedlite 580EX II firing in to an umbrella high up on a lighting stand; nine or ten feet high up. The big problem was getting the flash in the umbrella to trigger reliably with the wireless from the on camera flash. Getting the on-camera flash on the end of the OC-E3 and in the hands of a VCA (voice controlled assistant) meant the assistant could hold the master and aim it at the high up Speedlite in the brolly and I could get on with the shooting. I was using the master flash only to trigger the slaved one in the brolly after all. The VCA let on later that he'd seen this kind of trick on Joe McNally's blog some weeks ago so a Nikon trick works on the Canon's too.

Some of you will think; that's a 60cm cable length only on that OC-E3, but remember you can daisy chain them together too for more reach. Another thing is that the older Off Camera Cord 2 also comes up on ebay a lot for little money and they work just as well. If you're handy with a soldering iron you can even remove the short 60cm curly cable and replace it with a longer length of ethernet patch cable. Off camera cord and wireless E-TTL lets me use high speed sync to kill the ambient a little easier than using a dumb trigger like an ebay trigger or pocket wizard.


-blabpictures-

29 December 2008

Video editing

In the coming weeks and months, we're going to be doing quite a bit on using video from the EOS 5D Mark II, looking at both the high end editing areas, as well as the consumer options. For now though, I just wanted to flag up a bit of software I found that makes it easier to edit videos. 
Streamclip has two things going for it:
1. It is available for both Mac and PC
2. IT'S FREE! Yep, you read that right, it's free. Free, free, free, free, free. And we like free stuff!
It's also useful. Basically it's a convertor, player and editor for video files. While it may not be the most full featured editor (in fact, calling it an editor is stretching the definition a little) it does trim movies. It also plays most of the files you want and more importantly, the EOS 5D Mark II files. It's real strength is in converting files though.
Now, the MPEG 4 files from the EOS 5D Mark II will play nicely with most editing software, but there are other formats that play better - the most common currently being used for editing 5D Mark II files is ProRes 422. This makes much bigger files (by way of example I converted a 461MB H.264 compressed EOS 5D Mark II file to Pro Res 422 and it came out at 2.42GB!) but they also work better when you come to edit them in software such as Final Cut Pro. 

So, we'd urge anyone thinking about playing with the movie functions of an EOS 5D Mark II to at least go and download Streamclip and have a mess around with it. Hey, it's free. What you got to lose?! 

-blabpictures-

28 December 2008

No blog Sunday

You survived Christmas, now New Years Eve to look forward to. Surely you got some photo goodies for Christmas, so go and and use them to make better pictures.

See you Monday.

-blabpictures-

27 December 2008

Err did we miss it?

No, nope, not at all. Well, nearly! 
It's Saturday (just, and depending on your time-zone) and so we've just squeezed in a post for today as well :-) Lucky you guys. 

Well Christmas, as far as I'm concerned, is over. The other half keeps telling me that Christmas extends through to New Year when the decorations come down, but I've got that humbug spirit and as far as I'm concerned, it's over. Christmas and me have never got on well - it's fun and all, and the presents are great (I've not got to receiving socks yet so I'm still ok) but really I just find the whole thing a bit of an anti-climax. You spend ages looking forward to Christmas day and then...ooopps you missed it. That said, this year, despite the stinking cold I had, Christmas was not a wholly bad affair. In fact, it was quite fun really. 

Anyway, it's this got to do with photography? Not a lot to be honest, but I thought I'd give you something to chuckle/sneer at (delete as applicable) while I figure out what to say. 

The other thing about Christmas time is the way the days just seem to disappear. I always have good intentions of getting out and doing some pictures on the big day itself or Boxing day, but usually it's midday before I'm out of bed and then if the weather is anything other perfect, it's dark by the time I dressed and ready to go anywhere. This year was no different. But I did make it out of the house today for an hour in the freezing cold to grab a few shots at sunset. And it's this that I thought I'd talk about....well, this and light. 

Hands up those who have been out to take sunset pictures? Yep, quite a few of you. Hands up those who have seen the sun set and then packed up to leave only for the light to get stunning? It's a learning experience for sure. As well as a cursing experience. I recently came across a bit of software for the iPhone called PhotoCalc. This is something amazing and does all sorts of cool things which I'll look at in future posts, but the pertinent point for this post is the sunrise/sunset calculator. Using the iPhone's GPS ability it works out your current location, then calculates sunrise and sunset, as well as twilight times which really helps if you want to get the best pictures by giving you exact figures for the 'Golden Hours'. Now you can plan your butt freezing times to the minute and make sure you're home in time for dinner.

-blabpictures-

26 December 2008

Getting the correct exposure when using a remote release cable

It's another one of these what is that bit for kind of articles. EOS cameras can all be triggered using cable releases or in some cases infra-red remote releases. Usually this is done when the camera is on a tripod or located in a difficult to reach location. This odd location can cause problems since the light from the environment can enter the viewfinder from the rear - where you would normally be looking - and this can cause the exposure meter to meter erroneously. To prevent this kind of error you need to use something to block the light entering the viewfinder.

Eyepeice cover to prevent incorrect exposures when using a cableCanon has two solutions, the EOS-1D series solution with an eyepiece blind, and the other method of a piece of rubber on the camera neck strap. Since yesterday looked at EOS-1D models then today it's EOS 450D's turn. Though this also applies to the EOS 1000D, 40D, 50D and 5D Mark II. 

First up you need to remove the eyepiece rubber frame so that your camera looks similar to this one. 

The next part is to locate the rubber cover on the strap, it's always now that you realise you left that bit on the standard strap when you replaced it with an Optec one!
Eyepeice cover to prevent incorrect exposures when using a cable
Here the cover is fitted over the eyepiece and will block stray light entering the viewfinder and messing up the exposure.


-blabpictures-

25 December 2008

What is that, and what is it for?

EOS-1D / 1Ds Mark III secured USB connection
If you got one of these for Christmas, then you were a very good person in 2008. This little bit of plastic and metal screw can be found in the box with a new EOS-1D / EOS-1Ds Mark III camera. It's designed to hold in the USB cable when shooting tethered to a computer - often in a studio.

EOS-1D / 1Ds Mark III secured USB connection Side view of the EOS-1D / 1Ds Mark III

EOS-1D / 1Ds Mark III secured USB connection

Side view with the cover removed. These covers are designed to cover all the pins that are used for communication and power with the WFT-E2 wifi transmitter, but often work loose over time.


EOS-1D / 1Ds Mark III secured USB connection Here's the USB cable plugged in to the camera. Often this is used when shooting in the studio with the camera tethered to the computer. In this way images can be seen on screen right after they have been shot. Quite nice if you have to shoot with an art director peering over your shoulder, or if the make-up artist or stylist wants to make sure the image is perfect. You'll need to use EOS utility for this.

On the original EOS-1D and EOS-1Ds models a big 6-pin firewire 400 connector was fitted, and there were complaints when the EOS-1D Mark II was launched as it switched the big 6-pin to a small 4-pin connector. The result was cables falling out - a lot, and also the connectors themselves wearing out or breaking. Canon service centers can replace or repair them if your's is not working. With the EOS-1D Mark III the engineers realised that the placement of the screwed in to the magnesium body terminal cover for the WiFi unit was the ideal to use as a strong attachment point. So the little metal knurled screw and plastic bit in the box. At a Canon launch the Canon staff even showed the camera dangling from it's USB cable. I'd be more concerned for the strength of the USB cable!

EOS-1D / 1Ds Mark III secured USB connection
So finally we have the cable and it's retaining screw and plastic bit. It seems small, but this will likely protect your EOS-1D / 1Ds Mark III from broken USB ports if you tether it to the computer a lot. If you got an EOS-1Ds Mark III you should have two USB cables the standard one and a 5 metre one. The designers also made the knurled metal bit with a threaded hole in the top so you can avoid putting the plastic cap down and loosing it immediately.

Canon designers went one more step, they made the plastic also fit if you're using the WFT-E2 perhaps to give you extra or redundant storage on the camera.


Congratulations if Santa left you one of these cameras under your tree, share some thoughts or photos with us and you might be a Tuesday tog in 2009.

Happy Christmas from -blabpictures-

24 December 2008

Stop the blurred pictures when manual focussing

You've bought a great new EOS camera, and it's got a great autofocus system, though sometimes you just need to focus manually. With the advent of Digital EOS the viewfinders of the cameras were shrunk since the sensors and mirrors also were downsized. This can make it harder to see the correct focus point when you have taken the plunge and 'gone on manual'.

EOS dioptre correctionIf you pictures look blurred in the viewfinder normally, but the camera seems to focus fine then most likely the viewfinder is not set correctly for your eyesight. You need to adjust the viewfinder dioptre correction. It's a bit like the camera needs to be tailored for you, just like glasses or contact lenses are optimised for you. you can find the dioptre correction knob next to the viewfinder. Normally the cameras have a range of +1 to -3 dioptre but you can get additional correction lenses if you need a bigger or smaller correction.

EOS dioptre correctionOn most models the dioptre is easy to locate, but some models, EOS-1D series in particular, it's necessary to remove the eyecup to get at the adjustment. This tends to make it less likely that the adjustment gets changed by accident, and also follows that most pros use the same camera all the time. Your EOS 450D - pictured - may get passed from one family member to the next and need regular changes of dioptre setting.
The dioptre adjustment control is the one circled in yellow.

How do you adjust this viewfinder dioptre setting?
One of the most sensible ways is to remove the lens and simply look through the viewfinder, you are looking at the focussing screen that the images are seen on. If this focussing screen and the various marks, AF points etc look sharp to you then that is a good starting place. You may find it necessary ot point the camera at a brightly lit area or subject to judge this all critically. Once set you could even gaffer tape the control in place if you like - and some do!

It's Christmas eve and no amount of dipotre correction can fix alcohol base focussing - have a good one.

-blabpictures-

23 December 2008

Sharing your pictures

What's the point of picture taking if they only exist on your hard drive? I'm sure that there are a great many undiscovered masterpieces on hard disks around the world. One of the great things about pictures is that they give others the chance to share in your experiences and opportunities. To make all this work, and importantly to improve in your picture taking you need to share pictures with other people, photographers or not. The views of your peers can help you to hone technique or challenge you to try harder. If you think about professional photographers they seek out critique and evaluation of their work each time they shoot with the ultimate reward of being paid for the pictures too.

There's many great sites on the web for photo sharing and critiques where the community can give you feedback on your pictures. Of course public internet forums can be positive and negative, but taking the criticism and turning it into better ideas and pictures is the key.

If you were ever looking for a great big bit of Canon inspiration then flickr could well be the place; Canon cameras are the most popular on flickr and also the most popular DSLR and Compact camera. There are over 100 million pictures taken with an EOS 350D or 400D on flickr already. Flickr creates it's own star photographers, you can find amazing work in the explore feature of flickr.

However since this is holiday season, then you could do well to see the story of Aaron and Rosie, two people in different countries who met through flickr and are now planning to get married.

We're still working on the featured tog for Tuesdays and will start the feature in 2009 and have a few people lined up, but we'd love to hear from you in the comments.

-blabpictures-

22 December 2008

Squeezing the juice from a LIME

Fellow blogger and professional photographer Bert Stephani has launched a new project by photographers for photographers - so that's got our attention then. There's a video featuring Bert his model / muse Erika all captured by Pieter van Impe. The initial one on the site is a good un. Thanks Bert, Pieter and Erika.

www.squeezethelime.com says: LIME stands for Learn, Inspire, Motivate and Experience, a concept really important to us here too.

One thing; I know limes are green, but does the site have to be quite that green...?

-blabpictures-

21 December 2008

No blog Sunday

No blog Sunday, time to go and take some photos and do the last minute Christmas shopping. See you Monday

-blabpictures-

20 December 2008

Back to basics, Portrait mode

IMG_0005-blab
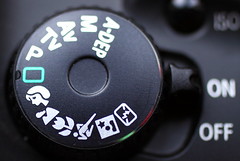
Moving the mode dial just one click round from green square to Portrait (the head symbol) mode changes your pictures quite significantly.

In short the camera changes the main program to try and give you less depth of field so that your perfect portrait stands out from the background; out of focus background, sharp subject. It does this by opening the aperture more than the green square mode, which also helps you by increasing shutter speed and reducing camera shake and subject movement.

Second big change is to continuous shooting, you hold the shutter button down and the camera keeps on taking pictures until the buffer fills. The idea is that a portrait picture capture the fleeting expressions of people, continuous shooting gives you more chance to capture a good expression by taking more pictures. However the expectation of the Canon engineers is that people are stationary when you take their portrait so the AF mode is set to one shot. You get focus lock with one of the AF points and then all the rest of the sequence of pictures you take whilst mashing down the shutter button will be focussed at the same point. Get the focus wrong for the first shot and you get a set of nicely out of focus shots. Also if your target is hyper active children and pets then this is not the mode for you.

The camera will also select the AUTO ISO setting, but lock it to ISO 100 in daylight to give you the maximum noise free picture quality. When the flash is popped up then the ISO will be ISO 400 to help the little on board flash reach a bit further.

As the light levels drop you will find the camera will pop up the built in flash when needed and it does a good job to try and fill-in shadows on the face as long as the person in your portrait is around 3 meters away. 10 meters and you will run out of flash range. You can't manually pop-up the flash in this mode.

The next and most striking change to pictures is how the camera processes them. Skin tones are a little more subtle, dayglo clothing tends to look a bit muted as the camera selects portrait Picture Style [much more to come on Picture Style in a future article]. This tries to give a good skin tone and softens the skin a little so that you don't get super sharp wrinkles on the models face; in camera botox lite!

As with many of these basic zone modes, selecting the appropriate mode gives the camera more information about what you want to acheive, the more you tell it what you want to acheive the better it can take photos to match your intentions.

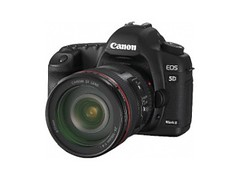
Most digital EOS cameras have the portrait mode, though if you're using an EOS-1D or EOS 5D series model then you have to make all the settings yourself.

-blabpictures-

19 December 2008

EOS 5D Mark II spots and stripes

5DIIDouble post Friday, but this is important. There's been some examples on the web of a phenomenon of black dots, and also to a lesser extent banding in images shot in sRAW1 with the new EOS 5D Mark II. Today Canon has delivered a statement from most of the companies service portals on this. Looks like there's a new version of firmware coming to deliver a fix for spots and stripes.

You can find the details here: Canon Europe Consumer Product Support site,

The notice also notes that the vertical banding issue seems to affect images shot and stored as sRAW1, and to a lesser extent sRAW2. Using RAW or JPEG images eliminates the banding, and also switching off highlight tone priority by setting C.Fn II-3 to 0:Disable can help if you need to shoot in sRAW1 or sRAW2.

If you're desparate for the firmware then keep checking on the Canon website where firmware updates for all EOS cameras can be found here.

-blabpictures-

EZ Speedlites and EOS DSLRs

Does it work? In three words, yes and no.

A Canon digital EOS SLR will fire an EZ Speedlite. But, there's no automatic metering so you'll need to go back to measuring subject distance and aperture and setting the flash power manually. If this is you, then here's some formulae that may help:

Guide Number/Aperture = Range

Guide Number/Range = Aperture

Aperture x Range = Guide Number

And if you want to know the Guide Number of your Canon flash, look at the first two numbers in the model name. 580EX II = GN of 58. 540EZ = GN of 54. MR-14EX = GN of 14.


-blabpictures-

18 December 2008

DXO Mark

Anyone seen the new DXO Mark sensor ranking tool? The one that 'measures' the sensor quality before any in camera processing is applied?

Am I the only one to find this a COMPLETE waste of time? What use is the RAW camera sensor data to anyone? Will it affect your buying decision? If it will, you need to stop and think first. While it's nice to know how good the sensor is according to a third party, what can you do with the information? Nothing. Nothing at all. Why? 'Coz the in-camera processing is incredibly important!

If you had the best sensor in the world, poor in-camera processing will ruin the images. Sure having a good sensor helps, but it's the combination of sensor and processor that makes the image. Looking at either of them in isolation is just a waste of time.

No, I'm not going to get on my soap box about the relative merits of the EXPEED vs DIGIC processor. Suffice to say, comparing sensors is interesting but not the whole story. Try looking at the whole picture.

Go on, comment with the words "disgruntled Canon fanboy"! I dare you :-)

-blabpictures-

17 December 2008

Sensor clean tip

Sensor cleaning. Argh! It makes grown men go weak at the knees. We've been told it's a delicate place to go and that it should be left to the professionals. But did you know you're not actually cleaning the sensor? It's the low pass filter in front of the sensor that gets the dust on it.

But that's beside the point. Now, up front I need to apologise as this is a UK based tip and I'm not sure how it works in other countries, but it would be worth checking.

When you buy an EOS camera, there is a one year warranty with it. Within that warranty period, Canon UK will do one full sensor clean. All you need to do is get it back to them by paying carriage (and insurance if you want) each way. They'll do a sensor clean and it'll come back pristine and ready for use.

With the advent of the Integrated Sensor Cleaning, manual cleaning with Arctic Butterflies, Swabs, Hoovers etc seems to be becoming a thing of the past - certainly my main EOS 1D Mark III has not had a manual sensor clean yet and it's done 20,000+ frames. But it's at least nice to know that if you want it done by Canon, the first one is free!


-blabpictures-

16 December 2008

Gang lighting?

Hold the phone....another 'two posts in one day' situation...and it's all Syl Arena's fault!

Just the other day we brought you news of Syl Arena - you remember, the guy with 12 580EX II Speedlites and a bunch of Radio Poppers doing high speed sync portraits in the middle of the day at 1/8000sec? Well it seems that 12 Speedlites in a ring just wasn't going to work for everything, so he's progressed to 12 in a line...to photograph his son, smashing pumpkins, in the middle of the day, at 1/6400sec!

You may want to ask why he needs such high shutter speeds, surely the flash will freeze the subject? Sadly not. This is a high s(p)eed sync situation! Syl did what we should all do when shooting something like this - try out different settings. As such, he tried everything from 1/400sec up to 1/8000sec and discovered that 1/6400sec was where it got sharp!

With each Gang Light post, Syl is eroding the myth of Speedlites and showing where a bagful of Speedlites can really trump a Studio pack - especially on location.

You need to be aware of flash range if you're going to play with high speed sync. By way of example, if you go two stops faster than the max sync speed your flash range is reduced by a factor of 2x. Go four stops faster and the distance is reduced by a factor of 4x.

Since distance and power are analogous in this situation you can see how getting up to 1/6400sec (that's five stops beyond the sync speed of the EOS 5D that Syl was using - though he claims five and a third because his EOS 5D only syncs at 1/160sec) really needs a lot more power than can be produced by just the one or two Speedlites - and hence the gang of 12!

-blabpictures-

Your opportunity to be the featured photographer on Tuesday

Hoping that you've noticed the previous Tueday postings have been mostly to highlight individual photographers and their causes, this is your wake up call to get in on the act. With traffic climbing here on a weekly basis this could be a great chance for your own promotion in 2009.

We're now contacting and collecting photographers for selection as the guests for something we termed Tuesday Tog. You get the opportunity to answer some of our questions, share some of your most inspirational work and even blatantly promote your own online presence or cause. If this sounds like something you'd like to be part of then leave some comments for us or by email to blog 'at' blabpictures -dot- co -dot- uk, sorry about the adress spacing but if you're human you'll understand. Mark the comments with DON'T PUBLISH in them and that way your details won't be all over the web - yet or again.


It's just before this post goes live, and I've just read a peice about being a professional photographer penned by Joe McNally on his blog. Ignore the title, it's a peak inside the mindset of a photographer with a mesmerising narrative that means you'll loose about 5-10 minutes whilst you read it yet gain some pearls of wisdom once you understand it. What's more Jason over at CanonBlogger has a great peice about the difference between male and female photographers.

Time to get out there and make contact, male or female you could be the photographer offering your insight for free and reaping the rewards as one of our Tuesday togs.


-blabpictures-

15 December 2008

Peripheral Illumination Correction

The perfect lens. Oh how nice that would be. Sadly, it's just not possible. Well, not unless you're a multi millionaire and are willing to pay many millions for each lens. Even then optical physics gets in the way and there would have to be compromises. Oh, and if you had "the perfect lens" you wouldn't be able to carry many of them!

So, with that in mind, Canon introduced a feature to DPP a while ago to help correct the problem of corner shading. Essentially they used testing and optical data to work out how a lens responds on a particular camera and then it can be corrected automatically. Simply go to the DPP NR/Lens/ALO tab and choose tune next to Lens Aberration Correction.

Now, that's all well and good, but what about in camera? Well, since they've got the data, there is no reason why, in theory, it couldn't be put into the camera. And that's what they've done with the DIGIC 4 processor. So, on the EOS 50D and EOS 5D Mark II there is a Peripheral Illumination Correction option in the menu that allows you to enable or disable it.

Obviously it only works with Canon lenses, and currently it's only working for around 40 lenses. 26 are pre-loaded into the camera and the rest, up to a maximum of 40 at a time, can be added using EOS Utility.

What you should remember about this is that it's nothing to do with AF Microadjustment, which we'll look at in a future post.

What does it look like? Well, the images below should give you some idea.

Oh, and in the image that has darker corners, it's not vignetting! Vignetting is a hard corner and has different causes. This is a softer corner and is caused by light not striking the pixels in the corners of the frame squarely.

PIC OFF
PIC_OFF0001

PIC ON
PIC_ON0001


-blabpictures-

14 December 2008

No blog Sunday

No blog Sunday, time to go and take some photos. See you Monday

-blabpictures-

13 December 2008

Is your software up to date?

Chances are if you are still using the same software that came in the box with your camera you would benefit from an update to the latest version. Since Canon puts a whole plethora of software in the box to allow everyhing from remote control of the camera, tethered shooting, organisation, RAW processing and printing you might find great new features with an upgrade to the latest version. Certainly if you shoot RAW and use Canon lenses then the latest version of DPP is the one with the biggest range of lenses supported for the lens abberation correction function.

Canon Europe puts all it's software on it's software download center at http://software.canon-europe.com. Here you can find not only English software versions, but also French, German, Italian and Spanish if that's more appropriate for you.

A bit of valuable advice DPP and EOS Utility are paired, if you download the Digital Photo Professional 3.5.1 updater, then you also need the EOS Utility 2.5.1 to go with it. This is the typical download for a lot of users but ZoomBrowser and ImageBrowser are there too.

Just recently Canon has added the camera instruction books as PDF files. I just checked the EOS-1D Mark III page and found English, French, German, Italian, Spanish, Dutch, Danish, Swedish, Finnish and even Russian camera instruction books. I think this is new because in the past the only place to get manuals was the Canon USA website.

-blabpictures-

12 December 2008

Backup your data

Maybe I'm paranoid, maybe I've more money than sense (nope, that can't be it!), or maybe I've lost data before, but as far as I'm concerned, if you place any value on your images at all - and that doesn't have to be monetary value, it could just be sentimental value - then backing up your images is an absolute must.
There is a well known saying in computer circles, that hard disc drives exist in two states: those that have failed, and those that are about to fail.
If you store your images on hard discs, you really are tempting fate if you don't have another copy stored somewhere else. "Somewhere else" should, in an ideal world, be offsite (to avoid theft, flood or fire at your main location) and possibly on a different medium, though this is not essential. If you can't get data off-site, then at the very least, you need two copies at home - two hard discs perhaps, or a hard disc and a collection of DVDs. With CDs and DVDs though, their shelf-life is not yet completely understood, so make sure you go for good ones that have been tested for archival purposes. If you're using hard discs, make sure you don't leave both connected to the computer. Having one remote and only connected when backing up will help ensure you don't fall foul of any spyware, malware or viruses that may corrupt your data.
There are many backup methods you can employ, and maybe we'll look at some of them in-depth in future posts, but for now, I wanted to flag the importance of a good backup routine in the hope that it might save one of your from losing data.

-blabpictures-

11 December 2008

High speed sync

Now this, this is all kinds of crazy. And no, I'm not talking about the fact that there is a double post today. This just had to be shared....

Many of you may know of a guy by the name of Joe McNally - a truly great photographer and someone who has mastered flash on location in almost every conceivable situation. Now we like Joe, even though he shoots Nikon... But for those that see his work and think "hmmmmm am I missing something with Canon and the flash system?" The answer is no and Syl Arena is the guy to prove it to you.

How does 1/8000sec sync flash in the middle of a bright day using Speedlite 580EX II flashguns sound? Interesting? Yeah, we thought so too. It seems that Syl managed to get hold of 12 580EX II flashguns on loan from Canon USA and a bunch of RadioPoppers as flash triggers and he built a ring light on a wooden frame. Well, he's calling it a ring lite, but it's more like a square light to me - but I'm just splitting hairs.

He used the RadioPoppers to trigger the Speedlites and so get enough power output for high speed synch at 1/8000sec. Pretty cool, huh?

So why would you bother? Well, high speed sync allows you to achieve a shallow depth of field when using flash in bright daylight with a fast aperture lens. Alternatively, you can turn day into night just by upping the shutter speed so you don't record as much ambient light.

We'll do more on high speed sync flash in a future post or two, but for now, we just wanted you to see this!

-blabpictures-

At Nikon's expense...

There's an amazing video reaction to the recently announced Nikon D3x DSLR camera on youtube. It seems that some photographers think that 8,000 US dollars is a bit too much money.


At least the Canon guys have been shooting with a fast aperture 24mm lens for some years.
On a slightly more reasoned Nikon footing there's a short selection of outtakes from the new Nikon School DVD about the Nikon flash system. Great news for Canon is that you can only buy this in the USA and there seems to be no plans to bring it over here. Cue the JoeBob show

In a return to more regular topics for this blog you should check out the initial thoughts of Ed Terakopian on the EOS 5D Mark II; it seems that Ed has a camera so that he can review it for the BJP Christmas edition - reads more like Santa stopped at Ed's door a few weeks early.

-blabpictures-

10 December 2008

Back to basics, flash off mode

In the first article of this series the full auto or green square mode was covered, so to keep it light here's the next simplest one - flash off mode. The flash off mode icon is the square with the lightning bolt in it that's crossed through. On most cameras is the last one of the basic zone modes.

Flash off mode can be simply thought of as green square but the built-in or pop-up flash won't be activated. If you happen to be a guest at a wedding then often the officials state that no flash photography is allowed during the wedding ceremony; now you know to move the dial to flash off mode.

If you're new to this photography thing, then select flash off and the camera will not switch on or use the flash. The only downside is that if it's dark then the camera will need to increase the ISO to make it more sensitive to light and most likely also lower the shutter speed.

Increasing the ISO will give you pictures that have more visible noise on them. Though usually noise is not noticeable in prints up to A4 or letter sizes. (All the purists will complain about this statement I'm sure). However you only have a limited range of ISO speeds depending on your camera model.

Slower shutter speeds is the next thing that will happen. This is not helpful as you will shake during the exposure and more than likely your subjects will move too. Camera shake and subject movement in the same picture makes for some pretty terrible images, thoug hit appeals as art to some. If the shutter speed shown in the viewfinder of the camera is less than one over the focal length of the lens you may get shake. So if you've zoomed in with your EF-S 18-55mm f/3.5-5.6 IS lens to 55mm then you need to be looking for 1/60 as the shutter speed. Sure Image Stabilizer (IS) will help a lot; maybe down to 1/8 but you're pushing your luck. Best is to brace you and the camera steady against the wall or put it on a solid surface.

The big thing with all these basic zone modes is that all the camera autofocus points are active, so you can't really control which subject the camera thinks is the right one. Its programming says that the closest thing to the camera is the subject! The lady in two rows in front of you is the subject not the couple getting married four rows in front of her.

Not sure - find a dark room or wait for nightfall and then shoot a picture of someone or something in both green square and flash off mode. This will help commit this one to memory.

Seems strange that the post following the one about the visit of the Strobist is all about stopping the flash firing.

-blabpictures-

9 December 2008

Strobist comes to town

The Strobist - David HobbyThe Strobist was here. David Hobby aka the Strobist was delivering his own brand of off-camera lighting seminar in London this past weekend. Around eighty people attended the two seminars held at University of London Union (ULU).

David's blog at http://www.strobist.com has a massive global reach with some 250,000 readers who get great lighting advice for free, and the chance to share their work with other strobists via the flickr strobist group.

In this workshop Daivd mixed presentation and practical shooting using models carefully hidden as seminar guests. Here David is adjusting a gobo that's in front of a shoot-thru umbrella. You need to try this at home since the effect is quite evident in the photos, yet really quick to achieve. David's gobo was made from a bit of cardboard box found somewhere on site at ULU. If you put a box down on Sunday and it went missing - here's your box.

Peter Geller from California Sunbounce was also on hand dispensing some free compilation DVDs of videos previously featured on the the California Sunbounce site. There was also a lucky prize of a new Sunbounce Micro Mini for one seminar attendee each day. You can see the Micro Mini in action in the hands of fellow strobist and Belgian professional photographer Bert Stephani.

The overall seminar was highly entertaining and valuable with almost seventy percent of the attendees on Sunday being professional photographer looking to sharpen their lighting. I think you may find pocket wizards a little in short supply in the run up to Christmas.

David's almost legendary shorts were out in action, he makes a pretty incongruous sight walking up the street to the pub in shorts and t-shirt on a December Sunday evening with the temperature hitting a cool one degree celsius.

If you want to check out his site, you may find a need to be watching carefully for his next visit to London. David describes London as the next strobist city after the Seattle Strobists, though they have Chase Jarvis on their doorstep.

If you'd like to be a featured photographer here then leave a message in the comments.

-blabpictures-

8 December 2008

Canon cameras need f/5.6 or faster lenses

If you have a Canon EOS digital SLR camera that's not an EOS-1D or EOS-1Ds model you really should make sure your lenses have a maximum aperture of f/5.6 or faster. Canon doesn't write this in big enough letters in their specifications and instruction books but for the AF to work as Canon intended it needs a certain amount of light, the amount being the same amount as you get through a lens with an f/5.6 or faster aperture.

I've heard a number of photographers in camera clubs saying that they have focus trouble with their Canon cameras and their third party lenses. I also hear that it gets worse the more they zoom in with their lenses. The usual culprit is the Sigma or Tamron 18-200mm f/3.5-6.3 lens, though sometimes it's the Tamron 28-300mm f/3.5-6.3. The key being the f/6.3 aperture at the longer end of the zoom range. Last time I checked in a camera store the Sigma 18-200mm goes to f/6.3 around 120mm.

For a long time there's been no Canon 18-200mm solution but the new Canon EF-S 18-200mm f/3.5-5.6 IS USM is getting some nice comments [dpreview.com forums] [ Digital Pro Talk], and note that it's f/5.6 at the long end so your EOS will do it's best to AF properly, and we're not just talking in low light but in all kinds of light.

Check the current line-up of Canon lenses there's not a single lens with a maximum aperture slower than f/5.6 - says something doesn't it.

EOS-1D guys don't worry your center AF point can focus at f/8 so if you want to put a 1.4x extender on the EF 800mm f/5.6L IS USM lens you can still get AF.


-blabpictures-

7 December 2008

No blog Sunday

No blog Sunday, time to go and take some photos or attend the second day of strobist seminars in London.

Don't forget you are reaching a critical time in terms of getting your online shopping done and delivered in time for Christmas, need some book ideas for the Canon fan?


See you Monday

-blabpictures-

6 December 2008

Canon Europe EOS 50D and EOS 5D Mark II campaign

If you've picked up a photo magazine in Europe in the last few weeks you've probably seen one or more of the latest adverts for the EOS 50D and EOS 5D Mark II that were shot by Rick Guest. Entitled Make Photography New Again the visuals are quite neat but in my view hardly inspiring. Way too high tech for mere mortals - maybe that's how adverts should be. Canon Europe posts clips on youTube from time to time in their channel.


I found that they also have a website mentioned on the advertising http://www.canon-europe.com/newEOS/, but amazingly it crashes Firefox on both my PC and MAC so I'll stay away from that one.

If you've got an opinion on this then express yourself in the comments.

-blabpictures-

5 December 2008

EOS 5D Mark II on a helicopter

Well, we knew it would only be a matter of time before videos from the EOS 5D  II started to surface. this though, is much sooner than we thought we'd se something like it! That is a brave man...or rich! I have tried to fly radio controlled helis and while I had some success, it take a LOT of practice to be good enough to willingly strap an expensive camera to the bottom. The possibilities are endless though - how many cool shots and different angles can you achieve now?!


-blabpictures-

4 December 2008

Canon riding the recession quite well

A key of buying any DSLR camera is the system behind it. The system is what gives DSLRs the huge range of capabilities, the adding of longer, wider, faster lenses a selection of flashes is all part of the buying process. Often new photographers buy the camera and then check out the system that goes with it. It should be the other way round, the system should decide the camera. However what if the compnay is facing difficult times, there's a recession on don't ya know.

Well buying a Canon just got a lot more comfortable, this article Cut-free zone: a company to copy in a slump in the Independent explains that Canon is riding the recession better than many of it's Japanese peers. Having a cash pile of 737 billion Japanese yen is quite a comfort zone, that's 5 billion pounds in English money! I wonder if some of that cash is earmarked for Canon's SED TV ambitions now that the patent issues seem to have cleared?

So it's a fair guess that they will still be in business when you've finally saved up the money to buy that last bit of your EOS system.

-blabpictures-

3 December 2008

Put your name in every picture you take

All digital EOS cameras have the option to store the owners name in the camera. Usually it’s done by connecting the camera to your PC or Mac and running EOS utility. You have 31 characters and can use alphanumeric characters but not things like the copyright symbol ‘©’ or the at symbol ‘@’. Then for every picture that camera takes the owners name is embedded in the image files themselves. I’ve seen photographers put their names and cell phone number in the field.

In the recent EOS 50D and EOS 5D Mark II cameras Canon added the option to include the photographers name and copyright notice in the standard EXIF data fields of each image. This is in addition to the owners name field described above. The only drawback is that it’s possible to delete these two fields from the camera using the camera menus. Owners name can only be removed using the EOS Utility.

With the wide spread of images it’s a good idea to make sure your pictures can always find their way home when someone wants to pay you for their usage.


-blabpictures-

2 December 2008

XDRTB

BLAB Pictures is about Pictures. And photography. And kit. The aim is to pass on tips and tricks, discuss things we find interesting and generally have a natter about anything photo related. 
This post fits into the pictures category. 
A little while ago, the story of XDRTB broke globally. For those interested in photography, the name James Nachtwey should need no introduction. For those that don't know who he is, wikipedia is your friend! In short, he has been photographing wars for years. He is one of the greatest photojournalists currently working and has won the Robert Capa Gold medal five times.
His story on XDRTB was funded by TED. TED (Technology, Entertainment, Design) began in 1984 as a conference bringing together people who work in these fields, most especially, influential people in these fields. People who may actually change the world, or who have something interesting to say. 
As one of the foremost photojournalists of his generation, James Nachtwey was granted his "TED wish" to tell a story of his choosing. He choose XDRTB - Extremely Drug Resistant Tuberculosis. Not surprisingly, he choose photography to tell this story. 
In the last few years, there has been a shift in the way photo stories are presented. It used to be the glossy Sunday supplement, now it's the web and new media. The images from the project are presented in this way and are well worth looking at

!WARNING! Some images may cause distress. 

-blabpictures-

1 December 2008

Sharpen your EOS-1D and EOS-1Ds response

The EOS-1D models have the distinction of being Canon’s fastest reacting cameras. By this I mean they have the shortest shutter release time lag of any model; but did you know that with some tweaking of the settings you can make the camera even faster?

When you press the shutter release there are several mechanical things that need to happen; the camera needs to lift the mirror, set the aperture on the lens and then release the shutter to start the exposure. In the camera instruction manual for the EOS-1D and EOS-1Ds Mark III cameras the text says that if the aperture of the lens only has to stop down 3 stops or less then with the custom function C.Fn IV-13 set to 1 the release time lag drops by 20%. Normally it’s 55 milliseconds. So why is this not the default?

Canon chose to prioritise stable release time lag and so the default is to have the function deactivated and the sedate 55ms lag is what you get regardless of the aperture you choose. In 55ms the camera has time to close the aperture of any lens to its selected value. But if you tend to shoot mostly at or near to the maximum aperture of your lenses then setting this custom function will speed up the camera response by 20%.
Say you shoot football with a 400mm f/2.8L IS USM lens and only ever shoot wide open or at f./4 or f/5.6 then you’ll always get the faster release lag if you use this custom function.

If you have an older camera then you’ll be glad to know EOS-1Ds Mark II, EOS-1D Mark IIN and EOS-1D Mark II also have this feature available through personal function Pfn-26. You need to set personal functions using the EOS Utility software and a firewire cable.

-blabpictures-