Showing posts with label EOS Expert tip. Show all posts

15 May 2009

Tilt and shift lenses - what does shift do?

Canon has the largest range of tilt and shift lenses of any digital SLR system with the TS-E 17mm f/4L, TS-E 24mm f/3.5L II, the TS-E 45mm f/2.8 and the TS-E 90mm f/2.8. The original TS-E 24mm f/3.5L is also still in the market even if it's not made by Canon anymore. What makes TS-E lenses special is the range of movements of the lens assembly relative to the focal plane. Unsurprisingly the Canon lenses offer tilt and shift movements as their name would suggest.

First why the designation TS-E? Other Canon lenses for EOS cameras are EF or EF-S, but these special tilt shift lenses are not auto focus lenses so the EF or Electro Focus designation doesn't fit.

Since the movement of the tilt and the shift have different effects on the images we'll cover each of the two kinds of image results in isolation to make it clear, though the combination of the two is most powerful. For this article we'll look at shift, and use the video modes of the latest EOS digital SLRs to make the effect totally understandable. Tilt will be covered in a future article.

Shifting the lens on an EOS video capbable DSLR from Blab pictures on Vimeo.


In this video above the TS-E 45mm f/2.8 is fitted to our camera and the lens shifted parallel to the sensor all the way to the top limit of it's movement. Then in the first part of the video it's shifted down to the centre stop where a small indentation let's you know you've reached the centre of the movement, and in effect at this point the lens becomes a normal 45mm lens. Second part continues the movement of the lens from the centre to the lower limit. Watch how the trees in the video keep upright and how the video shows that the relatively small range of movements can change what is in the picture by so much. Use a hotshoe mounted spirit level to make sure the camera is level during the shoot to keep the trees upright. Sure you could try and frame the scene by tilting the camera, back to get the tops of the trees in, but then the trees will start to look smaller to the top and bigger to the bottom. This shift is like moving the camera up or down, and not just by a few millimetres.

TS-E lenses offer the ability to rotate the tilt and shift planes relative to the camera. This makes the seemingly impossible pictures possible. For example if you need to take a picture of a person who is stood in front of a mirror then you can shift the lens sideways and take the picture, the photographer will be simply out of the frame and importantly not showing in the mirror! Widely thought to be only useful for architecture, interiors and technical imagery the TS-E lenses offer amazing possibilities for creative photographers.

For more reading then check some of these links to the Scheimpflug principle,and an article on the TS-E 45mm lens on CPN. If you want to see the TS-E 24mm f/3.5L II 'dance' then check out the bottom of this preview article at dpreview.

-blabpictures-

13 May 2009

Diffusers

I was teaching the other day and the subject of reflectors came up. I'm not sure how but we ended up exploring the difference between a reflector and a diffuser. Now, while most people can understand what a reflector might do, the idea of using a diffuser between the subject and the sun is a little harder to understand, so I thought it best to demonstrate using two pictures....

1.


The first image is direct sunlight falling onto the flower head. The second image has a diffuser between the flower and the sun casting a big shadow. Which do you prefer?

2.


If you're struggling with the concept of reflectors and diffusers, here's a simple way to remember what does what:
Reflectors work to reduce shadows, diffusers work to reduce highlights.


-blabpictures-

9 May 2009

Focus distance limit switches on lenses

Some of the Canon lenses feature a little slide switch to let you restrict the range of focus distances the lens will operate over, but why? 

With the longer focal length lenses there's often quite narrow depth of field and also quite a large range of movement for the optics to cover from the closest focus distance out to infinity. If your subjects easily fall in to the range covered by a lens restricted limit switches then you get a much faster focus shift from minimum to maximum subject distance as the focus assembly only moves a small set of it's possible range. There are quite a lot of lenses in the range with focus limit switches including the EF100mm f/2.8 MACRO USM, EF135mm f/2L USM, EF70-200mm f/4L IS USM. In fact most L series lenses with focal lengths longer than 100mm have focus limit switches. In the case of a mega lens like the Ef800mm f/5.6L IS USM there's three positions for the limiter including the full 6 metre close focus to infinity range!

Coming back to something more normal the popular EF70-200mm f/4L IS USM has focus limit ranges 1.2m to infinity and 3m to infinity. So if you are shooting say motorsport and are over 3m from the track boundary choose the restricted range of focus, the lens will move from the new 3m minimum focus to infinity much faster than it would from 1.2m to infinity. This makes the AF seem more snappy when you pick up a camera and the initial focus is way off. There's just less time spent hunting for the subject while the lens racks in and out from minimum to maximum focus distances.

-blabpictures-

7 May 2009

IS Modes

I wrote about Image Stabiliser lenses with movies just the other week as well as shutter speed choices to avoid camera shake, so I thought I'd follow it up with some advice on the Image Stabiliser modes found on Canon lenses.

Most of the IS lenses in the Canon range feature two IS modes, cunningly named Mode 1 and Mode 2. These two modes cause the IS system to work differently so you can choose the mode depending on what sort of shot you're taking. The question is, when do you use each setting?

Mode 1 - General shooting. This is the mode you will have the camera set to most of the time. The IS mechanism will try and remove camera shake in both the horizontal and vertical direction, to give a sharp image.

Mode 2 - Panning. If you are shooting moving subjects, then one technique you might choose to use is a slow shutter speed and panning with the subject. If you get it right, this creates and image with a sharp subject and blurred background. It's a very effective technique and is used widely in motorsport photography especially. If you decide to have a go at panning, then you should set the IS Mode to 2. This locks the IS mechanism in one direction so say you are panning from left to right, the IS mechanism will not try to compensate for the horizontal motion, instead concentrating only on any vertical fluctuations.

-blabpictures-

2 May 2009

My Menu - what do you use it for?

When Canon launched the EOS-1D Mark III they added a new menu to the tabbed arrangement. Called  My Menu it lets you put six of your most regularly accessed functions on a single personalised menu tab. Judging by the number of photographers we've seen who have never ventured in to this green tabbed menu it's time to write something to help you make use of it. If you have a camera that was launched after January 2007 then you have My Menu in your camera and this applies to you, so that's all the current models at least.

Locked up mirror
One thing that photographers who have shot Nikon in the past often ask is: Can you make mirror lock up easy to access? Maybe Nikon cameras suffer from more mirror induced shake than Canon ones, but never mind My Menu is the answer. Since Canon puts mirror lock up in the custom functions menu it's quite a combination of key presses to get there. But with My Menu you can register individual custom functions directly in the menu. 

Highlight alert
Another feature that some photographers use is the highlight alert display. Basically areas of the image that are near to complete burn out flash on the playback displays. This can be a real help if you're trying to get the exposure all the way to the right without burning out. However if you show pictures to models and people who just want to see how the shoot is going then it's best to turn this off, they don't need to see all these flashing bits of the frame where you intentionally pushed the exposure to the limit. Putting Highlight Alert in the My Menu let's you quickly change between the settings.

My Menu as the default
Normally when you press the menu button on the cameras they return to the same menu as you last accessed but My Menu can be set as the default menu to be shown each time you press the MENU button on the camera. This makes you six pre selected menu items available to you directly. It's great when you have the items set correctly on the My Menu for your way of working, but actually a pain in the neck if you are still working through getting your settings sorted out.

As a guide here's some of the things that often make the My Menu on our cameras
  • Format - as soon as I put a new card in the camera I need to format it, so this is often the top item on the My Menu
  • Highlight Alert - for precisely the reasons mentioned above this one often appears. However highlight alert function is only on EOS 40D or higher models.
  • Highlight Tone Priority - for wedding shooters and even landscape photographers this one can help keep detail in the highlights, but it's downside is more chance of blocking up in the shadows.
  • AF point selection method - For cameras with quick control dials on the back I often use this to move AF point selection to the rear control dial with EOS-1D models. Then I don't need to do so much focus lock and recompose. It works for me in studio shooting situations and also reportage type work. Subjects are less aware of you if you don't keep waving a camera around!
  • Flash control - since all these models with My Menu have the ability to control the flash settings of Speedlite 580EX II and Speedlite 430EX II from the camera menu I tend to leave this in the My Menu too if I'm doing a lot of work with flash. It's simple to switch it out if I need something else.

Did you know that My Menu items can be set from the EOS Utility software. Start EOS Utility with the camera connected and then choose the Camera settings / Remote shooting item. Once the remote shooting panel appears you will find a green tabbed item in the middle of the screen. Here is where you configure the My Menu for that camera. Clicking on the My Menu settings text will display the currently set My Menu items from your camera and give the ability to add new items, remove items and even re-order the items in the My Menu. It's all quite simple and can also be changed at the camera menu too.

-blabpictures-

29 April 2009

Err 99

If you've never had an Error 99 failure, you're a lucky person. Error 99 seems to crop up now and again on pretty much all the camera models and if you've never seen it before, it can be quite daunting as it locks the camera out and stops you being able to do anything.

What causes it is more of a problem to diagnose though. Error 99 is basically a catch-all term. Think of it like the camera telling you that something is wrong, but it's not sure what it might be. Unlike the other error codes, of which the are about a dozen, the camera doesn't give too much guidance.

So how do you clear it, and what are the potential causes? In the first instance, turn off the camera, remove the memory card, battery and lens. With the lens off, take a look at the contacts and see if they're a bit grubby and need a clean (if they do, use a pencil eraser to rub them gently). With that done, put it all back together again and the camera should come back to life.

If you see an Err 99 once, it's not a cause to worry. If you start seeing it regularly, then you should seriously consider getting the camera into your nearest service centre as it will be pointing to an underlying problem that needs solving.

As we pointed out in this post on the EOS-1 Series Mark III firmware updates they now have a bit more information included and in fact, you're less likely to see Err 99 anyway.

So, how many of you have seen Err 99? Was it a one off or did it recur? Did you get it solved or is it ongoing?

-blabpictures-

27 April 2009

Please stop the ****in beeping!

Having been to a church wedding this weekend I have a top tip. For all of the photographers who are 'doing a bit of wedding work' to help make ends meet, a church marriage service is not the place for a beeping camera.

All the EOS cameras come from the factory with the beeps enabled as a default, to turn the beep off you need to go to the first menu tab and find the selection for BEEP and turn it off. Alternatively if you use back button focus then keep the camera in AI Servo AF and it won't beep either.

Maybe I'm just tuned to it, but the beeps of the wedding togs camera sure distracted me enough to notice he'd got a new EOS 5D Mark II and some EOS 5D cameras and only the new EOS 5D Mark II was beeping.

-blabpictures-

25 April 2009

Lens hoods and filters

Hands up those that keep filters on the front of their lenses for protection.

Now, those with your hands in the air (it's ok, you can put them down now) do you use the best filters you can buy? You know, the Canon range or the Hoya Pro 1 Digital etc?

No? You use the ordinary ones from the corner shop?

Shame on you. Let me put it to you simply. A filter creates another air-glass interface and increases the risk of light scatter, reduced light transmission, flare, ghosting, aberrations etc. If you don't use the best filters you can buy, you may as well give up on the expensive glass habit you have and buy cheap milkbottle lenses for all the good you're getting out of your L-Series ones.

More to the point though, what protection is a filter on the front of the lens going to give? Honestly, if you drop it, two things will happen. The filter will break, thereby scratching the front element anyway, and the filter mount will deform leaving you with a broken filter jammed to the front of your lens. Great scenario!

In my opinion, there are only a couple of occasions when using a filter on the front of the lens is acceptable. 1. On a beach or dune with wind-blown sand. 2. In a rain storm with driving rain. 3. When the lens is pointing out of a fast moving vehicle in the direction of travel.
Notice anything about these scenarios? They all involve the possibility of wind-borne objects hitting the front lens element. At all other times, your better off without.

If you really want to protect the front lens element, get a lens hood. Lens hoods should be bought with lenses as standard. In fact, we wish Canon would start bundling them with all the lenses, not just the L-Series.
The lens hood, while not as effective against wind-borne objects, is effective against dropping the lens (it acts like a crumple zone), fingers getting the front of the lens accidentally, and most importantly, lens flare. Using a lens hood should be a matter of course. It will improve contrast in your images, reduce flare and ghosting and give you that piece of mind that for most situations, the front of your lens is well protected.

-blabpictures-

24 April 2009

Does sharpening add up in DPP?

Recently the world famous camera store in New York known as B&H has made available a really interesting video of a seminar presented by Erik Allin from Canon USA. The seminars are all about the Canon software. If you want to find no better use for the best part of two hours it's worth a watch. Even better is that the section with the demonstration of techniques in the Canon Digital Photo Professional software are covered in probably some of the most depth ever seen in the wild. Check out video 2 of 3 and 3 of 3 particularly. Big thanks for that Erik and B&H

However on the topic of sharpening we'd like to dispute the claims made in the video that you can choose to do sharpening in either the RAW or RGB tabs of DPPs tool palette. In our quick test the two sharpening sliders are cumulative. So set +10 sharpening in the RAW tab and then set +500 sharpening in the RGB tab. We found that with both sets of sharpening set to the max then it's more sharpened than when either of them individually is set to the maximum. 

These images are screenshots from DPP edit image window and are in split screen mode at 100% view.

RAW +10 sharpening, RGB 0 sharpening
RAW10
RAW +10 sharpening, RGB +500 sharpening
RAW10-RGB500
RAW 0 sharpening, RGB +500 sharpening
RGB500
To me it seems that the RAW sharpening is applied to the RAW data and then additional sharpening on the RGB data is applied, one small contradiction in an otherwise great presentation.

So to answer the title question, RAW sharpening in DPP does add up.

-blabpictures-

17 April 2009

Slave Speedlite tips

430EXIIWhen using the Canon wireless flash system people work in one of two incompatible ways. They put the slaves in manual and set the power on the slaves individually, or they leave the slaves in E-TTL and then use either manual or E-TTL II on the master flash.

If you set the power of the slaves individually in true pure 'strobist' style then you have precise control and can in effect have more than the standard 3 groups of flashes. One flash at 1/128, one at 1/32, one at 1/4 and another at 1/2 power is all possible. Indeed this is the only way to work if you need this level of difference in power outputs. Problem is that to change the power levels you need to go round to each individual slave and make the change.

If you leave the slaves in E-TTL and assign them to the groups A, B and C; then from the on camera master flash such as the Speedlite 550EX, 580EX or 580EX II you determine the settings of each of the flashes in the slave groups. The only important thing is to note or remember which slave is in which group. For ease if you put A slaves to camera left, B slaves to camera right and the C as a background or hair light you don't go far wrong. You can have more than one slave in the same group if needed. 
Put the master flash in manual and then you can set the power level of each A, B and C group of slaves from the master. Leave the master in E-TTL II and use the ratio controls to balance A:B and the flash exposure compensation to adjust the strength of group C. 

In this second approach with the slaves assigned groups and left in E-TTL it makes it possible for a group of photographers to work in either style. The all manual strobist photographer can set the power output for his shots by adapting the power on his master flash, and other photographers can use E-TTL II with ratio control for theirs. Just recently on a model shoot outside we tried exactly this setup, and everyone got the results they needed. The slaves simply take the information from the master that communicated with them last and do what they are told switching from manual power outputs to E-TTL II outputs and even high speed sync as necessary.


-blabpictures-

15 April 2009

Closer than the minimum focus distance

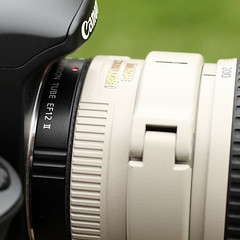
Extension tubeDo you ever hit the 'subject too close' limit with longer lenses? Wouldn't it be great if that 70-200mm lens with it's 1.2m closest focussing distance could be used even closer sometimes?

The EF12 II and EF 25 II extension tubes move the closest focus point of your lens even closer. Macro photography with an EF 500mm f/4L IS USM anyone?

Extension tubes are tools that some photographers see as only for macro work, but you can use them with a lot of lenses not just macro ones. Moving the rear of a lens further away from the sensor means that it will focus the light from closer subject distances than it can do normally, the downside - you can't focus on infinity anymore.

Some years ago Canon used to show a video with wildlife photographer greg Basco shooting snakes in trees using an EF 300mm f/2.8L IS USM lens with an extension tube on the back allowing much closer focussing.

In the past I've found the extension tube a neat solution to the problem of shooting through glass at zoos. In some cases you need to have the lens right up against the glass to reduce the reflection, but then the subject is too close for the minimum focus on the lens. Put on the extension tube and the problem is solved.
These two shots were taken with an EF 70-200mm f/4L IS USM lens at it's minimum focus distance, the first with the lens only, the second with an EF 12 II extension tube fitted between lens and camera.

200mm close focus 200mm close focus with 12mm extension tube

You can now focus at distances less than 1 metre from the subject but maximum subject distance becomes just less than 5 metres with the lens set to infinity.

When Canon introduced EF-S lenses with the EOS 300D it changed the extension tubes so that they could be used with EF-S lenses as well as EF lenses. This makes it possible to use an EF-S 18-55mm f/3.5-5.6 kit lens as a macro lens on an EOS-1Ds Mark III, but the subject distance is very short. Some wide-angle lenses aren't compatible with extension tubes as the point of focus moves to a point inside the lens itself.
For the technical or the inquisitive readers you can also combine extenders like EF 1.4x II or EF 2x II with extension tubes for even more magnification.
Extension tubes may make the automatic peripheral illumination correction available in DIGIC 4 cameras insufficient, and likely it will render flash distance information wrongly too.

-blabpictures-

10 April 2009

Getting on a plane

At some point, you'll be getting on a plane with your camera. It's a fact of life for a photographer. Trouble is, the rules and regulations for traveling these days make it ever harder. So how do you do it?

Here's my tips:

* Where possible, take no more than can fit in a carry-on bag.
* Study the hand-luggage allowances for your the airline and get the biggest bag you can that just fits inside the rules
* Look at the hand-luggage weight limit and treat it as a guide!
* Put your tripod in the hold
* Before going, make a list of what you want to take. Do this a few days before and gradually refine it
* Tick items off the list as you pack
* At the airport, carry the bag on one shoulder (if you're tall or broad, two shoulders is fine as the bag will be hidden behind you
* At no point make the bag look heavy. Even if your back is breaking, keep a smile on your face and make it look as light as possible
* Check-in online if possible - it shortens the time you spend in front of the check-in staff holding a heavy bag
* If you are unlucky enough to have your hand-luggage weighed and it's over limit, take out the heaviest items (a camera and lens is good) and sling it over your shoulder - it's now a personal item and therefore doesn't count
* Re-weigh the bag, complete check-in and walk off
* Put camera and lens back in bag once out of sight of check-in staff

So far, this approach has worked for me and I have repeatedly carried more than double the hand-luggage allowance onto a plane.

Well, as ever, you may have different views and we'd love to hear them.

PS - when packing, don't forget CF/SD cards and batteries with a charger... Oh and you know the euro plug cable that comes with the camera when you buy it? Don't throw it away. If you're travelling in Europe, take that instead of the UK plug cable with an adaptor - it's lighter and means the adaptor can be used for something else (the other half's hairdryer if my experiences are anything to go by!)


-blabpictures-

3 April 2009

Shutter speed choices

Camera shake can be the ruin of any image. Fortunately, with a little thought it's very easy to overcome. There is a rule-of-tumb that states to avoid camera shake, you should use a shutter speed that is no slower than the reciprocal of the focal length of the lens. This is based on a standard print size, which in the days when it was pronounced, was around 10x8inch. Now, in today's world where A4 seems to be the norm, that fortunately still applies. However, if you plan on printing bigger, then you might just want to reconsider those figures and perhaps make them a little faster. As with everything, it's worth doing some testing yourself.

What is true though, is that as resolutions increase, pixels get smaller and this can have an effect on camera shake or the appearance of subject movement in your images.


blab:
using a shutter speed no slower than the reciprocal of the focal length of the lens will avoid camera shake

Take for example an EOS 50D. This camera packs in 15.1 Megapixels onto an APS-C sized sensor. Clearly, those pixels need to be really quite small (a little under 5 micrometers - 4.7 to be exact). These smaller pixels mean that any movement during the exposure will occur over a greater number of pixels than if they were larger, and this will increase the apparent blur from either subject movement or camera shake. Now with the apprent increase in focal length due to the narrower field of view afforded by the APS-C sensor, and the smaller pixels, it's no wonder you might be in for some trouble if you stick to the old rule of thumb and work with the actual focal length to make your calculations.

For example, a 300mm lens on a camera should, in theory, need a shutter speed of 1/300sec (or 1/320sec since there is no 1/300sec setting). However, that 300mm lens on an APS-C sensor has the field of view of a 480mm lens. Although the magnification is no different, the lens needs to move less distance for it to be as apparent on the sensor, due to the effects of trigonometry. Effectively, for the same angular distance moved, it forms a greater percentage of the overall image on a smaller sensor than it does on a bigger sensor and therefore motion will be more apparent.

So how to get around it. Well from the camera shake side of things, Image Stabilisers are a great help giving 3, 4 or 5 stops of extra shutter speed. In other words if you need a shutter speed of 1/125sec without IS, you should be able to get away with 1/15sec with a 3-stop IS system - but you should do your own tests as everybody differs in how well they can hand-hold a lens. If you don't have IS, then you can use the same rule of thumb as before, but this time use the apparent focal length of the lens rather than the actual focal length:
For example: EOS 50D with APS-C sensor
100mm = 1/160sec
200mm = 1/320sec
300mm = 1/500sec
400mm = 1/640sec
etc....

For subject movement though, IS has no effect. You'll just have to up the shutter speed at which you shoot to ensure you freeze the action.

-blabpictures-

-blabpictures-

26 March 2009

EOS-1D Mark II - AF recall preparation

1DMkIIIBack at the beginning of March we wrote about Canon's latest plan for further improving the AF performance of it's EOS-1D and EOS-1Ds Mark III cameras. Now and for the second time the blabpictures EOS-1D Mark III is going back for rework on it's AF. Previously it's had the mirror box fix, though not that it seems to have needed the work, it's always been able to nail focus on the subjects it's been given. There has been some feedback on dpreview, fredmiranda and many other forums that this latest AF fix makes the camera pretty much what most users expected from the start. As the camera we have is one of those from the first few months of production it's wise to send it in and see if they can make it even better for free. Would be important to have proof of the fix if you were ever to sell it.

After reading a few other forum posts on the topics we created a short checklist of things to do before sending a camera in for rework, though it's also a good idea to do this before any service.
  • Write down your camera body serial number - make sure you get your camera back
  • Back-up the camera to a memory card
  • Remove all the other accessories the service team don't need and can lose; strap, eyecup, battery etc.
  • Make sure the body cap is securely fitting to prevent the ingress of dust and stuff in the shipping process
These items may seem like sense, but how do you backup the camera? Canon EOS-1D Mark III models have function to store a snapshot of your camera configuration on a memory card. You can put up to 10 different named files on a card, and the snapshots take up very little space. With this backup of the camera if service need to fully reset your camera then when it comes back you simply load in the backup and your camera is set-up just as it was when you entrusted it to service. Most people think this only backs up the custom functions, but in fact just about everything is saved, the power off time, the owners name, the display preferences pretty much everything except the time and date! 

Backup EOS-1D Mark III / EOS-1Ds Mark III
Hit menu and move the to the third yellow tools menu and the first item is Save/load settings on media. Press the SET button and then Save and Load are displayed, hit SET again with Save selected.  You are prompted for a filename or can choose the cameras own choice "CAMSET01.CSD". I select my own filenames, but they must have eight characters. I chose "BLAB_1D3.CSD" and then saved the file. Now don't format the card while the camera is away and when it comes back go through the process and Load the settings back in to the camera.

One tip here is to use a small old SD card for saving your camera configuration on. Then copy the card to your computer, maybe upload your settings to somewhere online, and put the little memory card in your camera bag. Now if you have the misfortune to get a breakdown any loan camera you pick up can be set-up just how you like it in a matter of seconds and you won't need an instruction manual to do it!

AF Microadjustment C.Fn III-7
One thing that many people are reporting is that their AF micro adjustments t are reset to zero as part of the service work. Your back up will keep your old settings. Many people are now saying the AF micro adjustment of their camera is zero for all their lenses so you might need to reset these to zero after loading your back up; just set C.Fn III-7 to 0:Disable.

Any readers with experience of the recall and some comments about their camera performance post recall please post in the comments.

-blabpictures-

21 March 2009

High speed sync flash - leave it on all the time?

When you're shooting with a Canon Speedlite you usually get the option for high-speed sync flash. I prefer to leave high speed sync on all the time and here's why.

If you shoot sometimes in the daylight and need to overpower the ambient, then opening up the aperture to get plenty of power from the flash is nice, but you often end up with hitting the sync speed wall. Leaving high speed sync on all the time means you just keep on driving through that wall. The only downside is that the flash power falls off the faster your shutter speed goes.
If your sync speed is 1/250s then at 1/500s your flash is half as powerful and at 1/1000s then a quarter of the power is yours and you don't get warnings to this effect in the camera so you need to keep an eye on the shutter speed.

Don't forget that if you go for manual power control on the flash or second curtain sync then you lose the chance to have high speed sync.

-blabpictures-

19 March 2009

Using DPP to make changes to multiple images at the same time

Canon's Digital Photo Professional (DPP) is supplied with each and every EOS camera but many photographers only touch the features on the surface.

Did you know that you can apply adjustments to a group of images in the main window all at once?
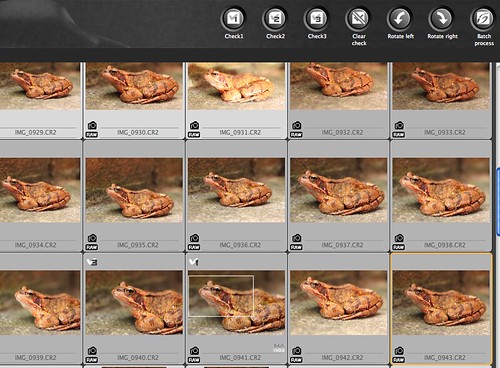
DPP main window


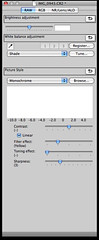
DPP tool panelSimply select a group of images in the main window then activate the tool panel using either APPLE-T or CTRL-T. Then all the changes you make in the RAW adjustment tab are applied to the group of selected images. Global white balance changes, Picture Style changes sharpening can all be done quickly and simply this way.

What's more if you set DPP to normally give you AdobeRGB images as outputs then you can also goto Adjustment menu and select Work color space and then you can change a group of images from AdobeRGB to sRGB or one of the other colour spaces listed. This is handy if you usually use AdobeRGB outputs and need to make some quick proof images for a web gallery. Typically sRGB is more readily accepted by internet browsers and so sRGB images are needed, but this quick change makes this simple for a group of images.

-blabpictures-

13 March 2009

Back button focus

Exposure lockBack button focus is one of the functions on EOS digital SLR cameras that gives a new layer of control over the picture taking process. In simple terms it places the shutter release, exposure lock and focus lock or activation on up to three separate buttons. If you have only ever used the 'out of the box' configuration with the AF activated with the half press on the shutter and the AE lock occuring with the focus lock in evaluative metering and this is not suiting you then it may be something to experiment with - though it's an acquired skill.

Probably one of the best articles on the topic is actually on the Canon USA website in their digital learning center. The article highlights five often quoted advantages of back button focus;
  1. Easier to lock focus
  2. Easier timing of shots
  3. Less risk of focus errors with moving subjects
  4. Easier over-riding of AF with full-time manual focus
  5. Easier macro and close up focussing
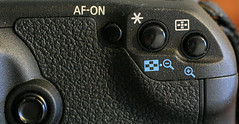
With the latest EOS cameras from the mid-range up providing separate buttons for AF-ON and AE lock '*' then there's also a function to switch round the operation of the two buttons. Great if you plan on using back button focus on an EOS 450D and an EOS 50D, as the EOS 450D doesn't have the separate AF-ON button and then the placement of the buttons may be out of sync with the two cameras.

Some photographers find that the use of back button focus eliminates the need to switch between AI Servo and One-shot AF modes. They simply use AI Servo all the time and switch the AF off when they have the right focus for their picture.

You might also find the previous article on blabpictures about AE lock and the metering pattern valuable further reading.

-blabpictures-

28 February 2009

Focussing screens - more than standard

All the EOS cameras feature a ground glass focussing screen. It's the translucent surface you see when you look through the viewfinder. We've explained before the importance of correctly setting the dioptre correction so that the screen is correctly viewed by the photographer. An increasing number of the EOS cameras allow you to change the focussing screen and it's something worth doing if your style of photography suits something more than standard.

Standard
The standard focussing screen fitted to your EOS is designed to give a bright clear image in a wide range of conditions and with a wide range of lenses. The maximum aperture of a lens determines how bright the screen can be, with lenses that have f/5.6 apertures giving a darker - harder to see - screen than lenses with faster apertures like f/1.4. The standard focussing screen has a special ground glass surface that effectively amplifies the light so even the slower f/5.6 lenses give a reasonably bright viewfinder.

Grid screen 
The first alternative screen is the grid screen, this one has a set of fine lines etched on it's surface making a grid pattern. These lines can help you with composition and also to keep horizons level and stop you composing with buildings falling over. In some cases they are used for technical purposes too. Brightness and viewfinder performance wise these screens are based on the standard ones so work well with all lenses.

Super precision matte - 'manual focus' screen
The first of the specialist screens is the super precision matte screen, sometimes called the 'manual focus' screen. This one has a different ground surface and as a result shows an almost real view of the actual depth of field that a lens and aperture combination will produce. The standard screen tends to show images with too much depth of field. The downside of this screen is that it gets darker quite a lot faster so Canon recommends it for f/2.8 aperture or faster lenses - exactly the ones you may be doing critical manual focus with.

Changing the focussing screen is quite simple, you remove the lens and release a small catch in the top of the mirror box, the screen drops down and using the tool supplied with each accessory focussing screen you lift out the existing one and replace with the alternates. Don't ever touch or try to clean the surface of the focussing screen, you'll end up buying a new one, but at around twenty to thirty pounds they are not expensive. When you change the focussing screen you need to set the appropriate custom function in the camera, this tells the exposure metering about the characteristics of the screen in use and tailors the metering system appropriately.

All EOS-1D models can have the focussing screen changed, as can EOS 5D, EOS 5D Mark II and also EOS 40D and EOS 50D. Some third parties provide screens and instructions for other models though you may invalidate your warranty if you fit them yourself.

Generally Ec-'X' screens are for EOS-1D models, Ed-'X' for EOS 5D, Ef-'X' for EOS 40D / EOS 50D and Eg-'X' for EOS 5D Mark II.

'X' indicates the type of screen, D = grid screen, S = super precision matte, A = standard screen.

In the case of the EOS-1D models there's a much more extensive range of focussing screens available including microprism and split image screens.


EOS 40D/ 50DEOS 5D Mark II


-blabpictures-

27 February 2009

5D II Movies


For some, this may seem obvious. For others, it'll be a confusion then a hassle if they get it wrong. Which group do you fit in?

When you're shooting movies and stills with the EOS 5D Mark II, there is something you really need to remember. It's obvious once you've been told, but easily forgotten in the heat of the moment. 

So there you are at a wedding. You're shooting a lovely portrait shot of the bride walking down the aisle. Mmmm you think, a bit of movie would be nice for the DVD. You enter Live View mode. You start shooting movie. You grab the odd still image as well. All's going great. 

You get home and download the images and movies. You start sorting out the movie clips and...... bugger ........ yep, you shot the movies in portrait mode and now you need to turn your screen on it's side .... or bin the file. 

Yep, that's it folks, if you're shooting movies remember that turning an HDTV on it's edge is really not conducive to the health of your back or your tv so make sure you only shoot in a landscape format or you'll be throwing away footage left, right and centre. 

-blabpictures-

21 February 2009

Stop taking pictures without 'film' in your camera

Canon DSLR cameras ship from the factory setup for simple demonstration at the photo retailer. Probably a carry over from when the internet photo dealer didn't exist and touch and try before buying cameras in store was popular!


blab:
'don't get mad, get even - make sure that camera can't fool you again and set it to only take pictures when it's got a memory card in'
The trouble is that the cameras are designed by default for taking pictures without a memory card being fitted. So you take the new camera home - or the delivery driver finally brings it to you - and the camera is still in shop demo mode. So batteries charged and loaded off you go for a shoot; forty** pictures later you realise that it would be really nice to review your first shots so you can post your - my first shots with my new EOS gallery. Now you find that you didn't load a memory card so you have no shots.

Press the MENU button, scroll or move down the first menu to find the Shoot without CF/SD or memory card option and set it to OFF. Now you will see messages on the camera that there's no card in the camera a lot, but you cannot take pictures without having loaded some digital 'film'.

** Traditionally in the days of film camera you would get around 40 shots before you realised the no film or mis-loaded film issue as you tended to get used to around 36 shots on a roll and if the film hadn't run out then usually it wasn't loaded.

-blabpictures-